-
Two Years of Daily Meditation
For the last 2 years, I've made an effort to spend about 10 minutes a day meditating. I've been using the Calm app listening and following the "daily calm". I tried other meditation apps, but have settled on Calm because I usually get a new guided meditation every day (there have been a number of repeats over the course of 2 years). Repetition in other apps was boring and made it very hard to keep meditating every day.
While 10 minutes a day is not a lot for those that have done meditation for a long time, it is a good start for me and I've managed to take the few minutes a day out of my schedule to just sit. As someone that finds it hard to sit still and do nothing, I consider this a huge accomplishment.
My day is not complete without my daily Calm and I hope that doing this is starting to change me for the better. Is it working? Sometimes.
-
Think Globally, Act Locally
Think Globally, Act Locally
More than 30 years ago, I took a tour of the Boston Globe as part of my high school graphic arts class. During the tour, they showed us the printing presses that were idle and hadn't been cleaned yet after the prior night's run. I asked what happened to all the paper still in the presses. I was told that they just threw away all the paper. Looking back on this answer, I believe it may have been incorrect, but it started me thinking about how much we waste (paper in particular). I decided to start a paper recycling program as my Eagle Scout project at my high school as a way to help reduce waste.
I became very involved in recycling efforts and joined my town's recycling committee. My interest in recycling was probably the start of me thinking about the slogan "think globally, act locally". This slogan, of course, wasn't new at the time, but was very on point as my recycling program wasn't going to change the world, but it was a small part that I could to do help and if there were other like minded people, we collectively could do great things.
Recycling of paper products is now common place and people don't think about it much. While I definitely didn't make this happen globally, I'd like to think that I helped educate thousands of people through my efforts.
In my adult life, I've tried to keep following the act locally mantra by volunteering and by donating money. I know I'm not going to change the lives of millions of people and my name probably won't be known by many people, but that doesn't matter as long as I can make an impact on a few.
Now more than ever, I think the "think globally, act locally" slogan is important. While we as individuals can't make COVID-19 go away, small acts such as wearing masks, staying home, and physically distancing can make a huge difference if we all followed the guidelines. When safe vaccines become available, getting one is another way to make a difference. It isn't necessarily about protecting you from COVID-19, but also about protecting others. There are certain people that can't get vaccines and we, as a society, need to do our best to protect them.
Some of the guidelines that we're being asked to follow may be inconvenient, but we're all in this together. I don't think there are any excuses to not following the guidelines; some people are selfish and believe it is all about them and other people are not science literate to understand why we have been asked to do certain things. I am fortunate that I can financially ride this out; if everyone had followed the guidelines 6-9 months ago, we may not be where we are today with the increasing numbers and with so many people hit financially.
I urge people to do their part now and when we get through this pandemic about acting locally so that we can all help make the world a better place.
-
A look at UL/ETL Certification and Home Automation
Ever since I can remember, my dad has told me that any piece of electrical equipment that has a cord or is hardwired should be Underwriters Laboratories listed. UL listing means that a sample of the product has undergone testing and meets certain criteria for the type of device it is. Does this mean that items that lack the UL listing aren't safe? No, it could just mean that the company didn't spend the money to get the product tested.
Most things you buy with a cord are UL listed, so it really isn't a concern. However, with more and more products coming direct from overseas and being developed faster and cheaper, it is becoming more common to see mass market products lacking UL listing.
Taking a slight detour here, UL has been the predominant testing lab/certification and the one that most people recognize. However, recently more products bear the ETL mark. Edison Testing Laboratory was started by none other than Thomas Edison and performs similar functions to UL. I've done a bit of research and the only real difference is which service a company choses to use. ETL tests to the same standard as UL. I suspect there could be a cost or time to test difference between the two.
I've been very cautious about things I buy direct from overseas and even some things I buy here that aren't from mainstream manufacturers. While a UL or ETL mark doesn't guarantee that something is going to be safe, it gives me some reassurance that an independent lab has looked at the product.
When I went to purchase a 3D printer, the Creality Ender 3 Pro was advertised as having a UL listed power supply (older ones didn't). This got me curious about what that meant. Components of products can be UL listed without the entire product being listed; for whatever reason the whole device didn't go through certification. These components bear a different mark called a "listed component".
So while the power supply on the printer is UL listed, the printer itself is not. I'm not overly concerned about this as the power supply is the piece that connects to 120 V and outputs low voltage. This, of course, doesn't mean that the printer couldn't catch fire (I've seen reports of this).
For my son's Eagle Scout project, he's building something (I'll post about it when it is complete) that plugs into the wall and is controlled by a low voltage circuit. We found an example of what he wants to do on GitHub where the author posted a list of components. One of the components is a solid state relay that takes line voltage (120V) on one side and is controlled by low voltage on the other. While relays are quite common, mixing low and line voltage can be dangerous. According to the National Electric Code any time low voltage and line voltage are placed in the same electrical box, there must be a plastic separator between the two. When we remodeled our house, I had to find electrical boxes that had separators as I put low voltage audio controls in every room next to the bank of light switches.
Looking at this relay, I didn't see a UL component mark on it and even if I did, I'd be concerned about putting it in a box that had line voltage and low voltage. So in my effort to help my son (adults can help on projects and he's asked me to handle the electrical part and some of the electronics due to my knowledge of the field), I started researching parts that are UL or ETL certified so that we didn't have to worry about mixing line voltage and low voltage. The pieces we're looking at are widely used in IoT devices and consist of an outlet that can be controlled by a low voltage circuit.
I've looked and looked and have found some standalone outlets that are listed. I came across a blog post talking about the Sonoff smart plugs that are UL listed. Excellent, I may have found what I needed. I purchased 2 of the plugs and received them last week. They didn't have an ETL logo on them, but did have a UL logo on them. Unfortunately looking up the product in the UL database didn't come up with anything, but it did appear in the ETL database. When I asked Sonoff about this, they said that the S31 was ETL certified and not UL listed. That's kind of odd and the discrepancy is enough for me to send them back. I did, however, find another outlet TGWF115PQM by Top Greener that is UL listed (and is in the UL database). In addition, this plug was easily flashed with the Tasmota firmware that works with Home Assistant and I believe it will work for my son's project.
Many of the major brands of IoT devices, including the Belkin plugs don't list UL or ETL certification on their web pages. If they are listed, I think that would be an important fact to mention on their site. If you browse Amazon for smart plugs, you'll see some say CE or FCC certification; this is NOT the same as UL or ETL certification. Even if they say ETL or UL listed, I'd strongly encourage people to lookup the products and verify the certifications at UL or ETL.
If you're in the market for IoT devices, look carefully at the certification on the devices and would not order anything direct from overseas that is line voltage (I ordered a small computer last year direct and the external power supply was not UL listed so I just swapped it with another one that I had just to be on the safe side).
Stay tuned for more on the project and the journey.
-
Ryobi 18V ONE+ HP Compact Brushless Drill and Impact Driver Review
I've written a number of times about how much I like my Ryobi tools. This summer one of my small 1.5 Ah batteries died, so I looked at getting new ones. While many people prefer the larger batteries that last longer, my projects typically are short and don't require a lot of power. The small batteries are lighter and make the tools easier to use. Home Depot (the exclusive seller of Ryobi products), has a version of 1.5 Ah batteries that don't have a fuel gauge on them; to me, this makes the batteries pretty useless. There are a number of sellers on eBay selling the 1.5 Ah batteries with the gauges for about $30 per battery.
I saw that Ryobi released new HP brushless tools including a drill/driver kit with 2 1.5 Ah batteries that have fuel gauges! The cost, however, is $180 meaning the driver and drill are about $120. As I already have a perfectly good drill and driver, it was hard to justify.
For the holidays, I saw that Home Depot discounted the set by $40 bringing the cost to a bit more reasonable $140. I still didn't need the set, but the new tools are lighter than my current ones and potentially more powerful than the ones that I bought many, many years ago. I couldn't help myself and hit the buy button!
The tools arrived last week and the batteries are smaller and slightly lighter than my existing 1.5 Ah battery and have a sleeker design. The new impact driver weighs 842 g (without battery) and the drill 952 g vs 1192 g and 1226 g respectively for my old set (I have an even older drill that weighs 1420 g). The battery is 410 g vs 446 g for the 1.5 Ah battery. The weight differences are huge!

Left is the oldest drill/driver; middle was the one I bought a few years ago and the one on the right is the latest brushless drill/driver
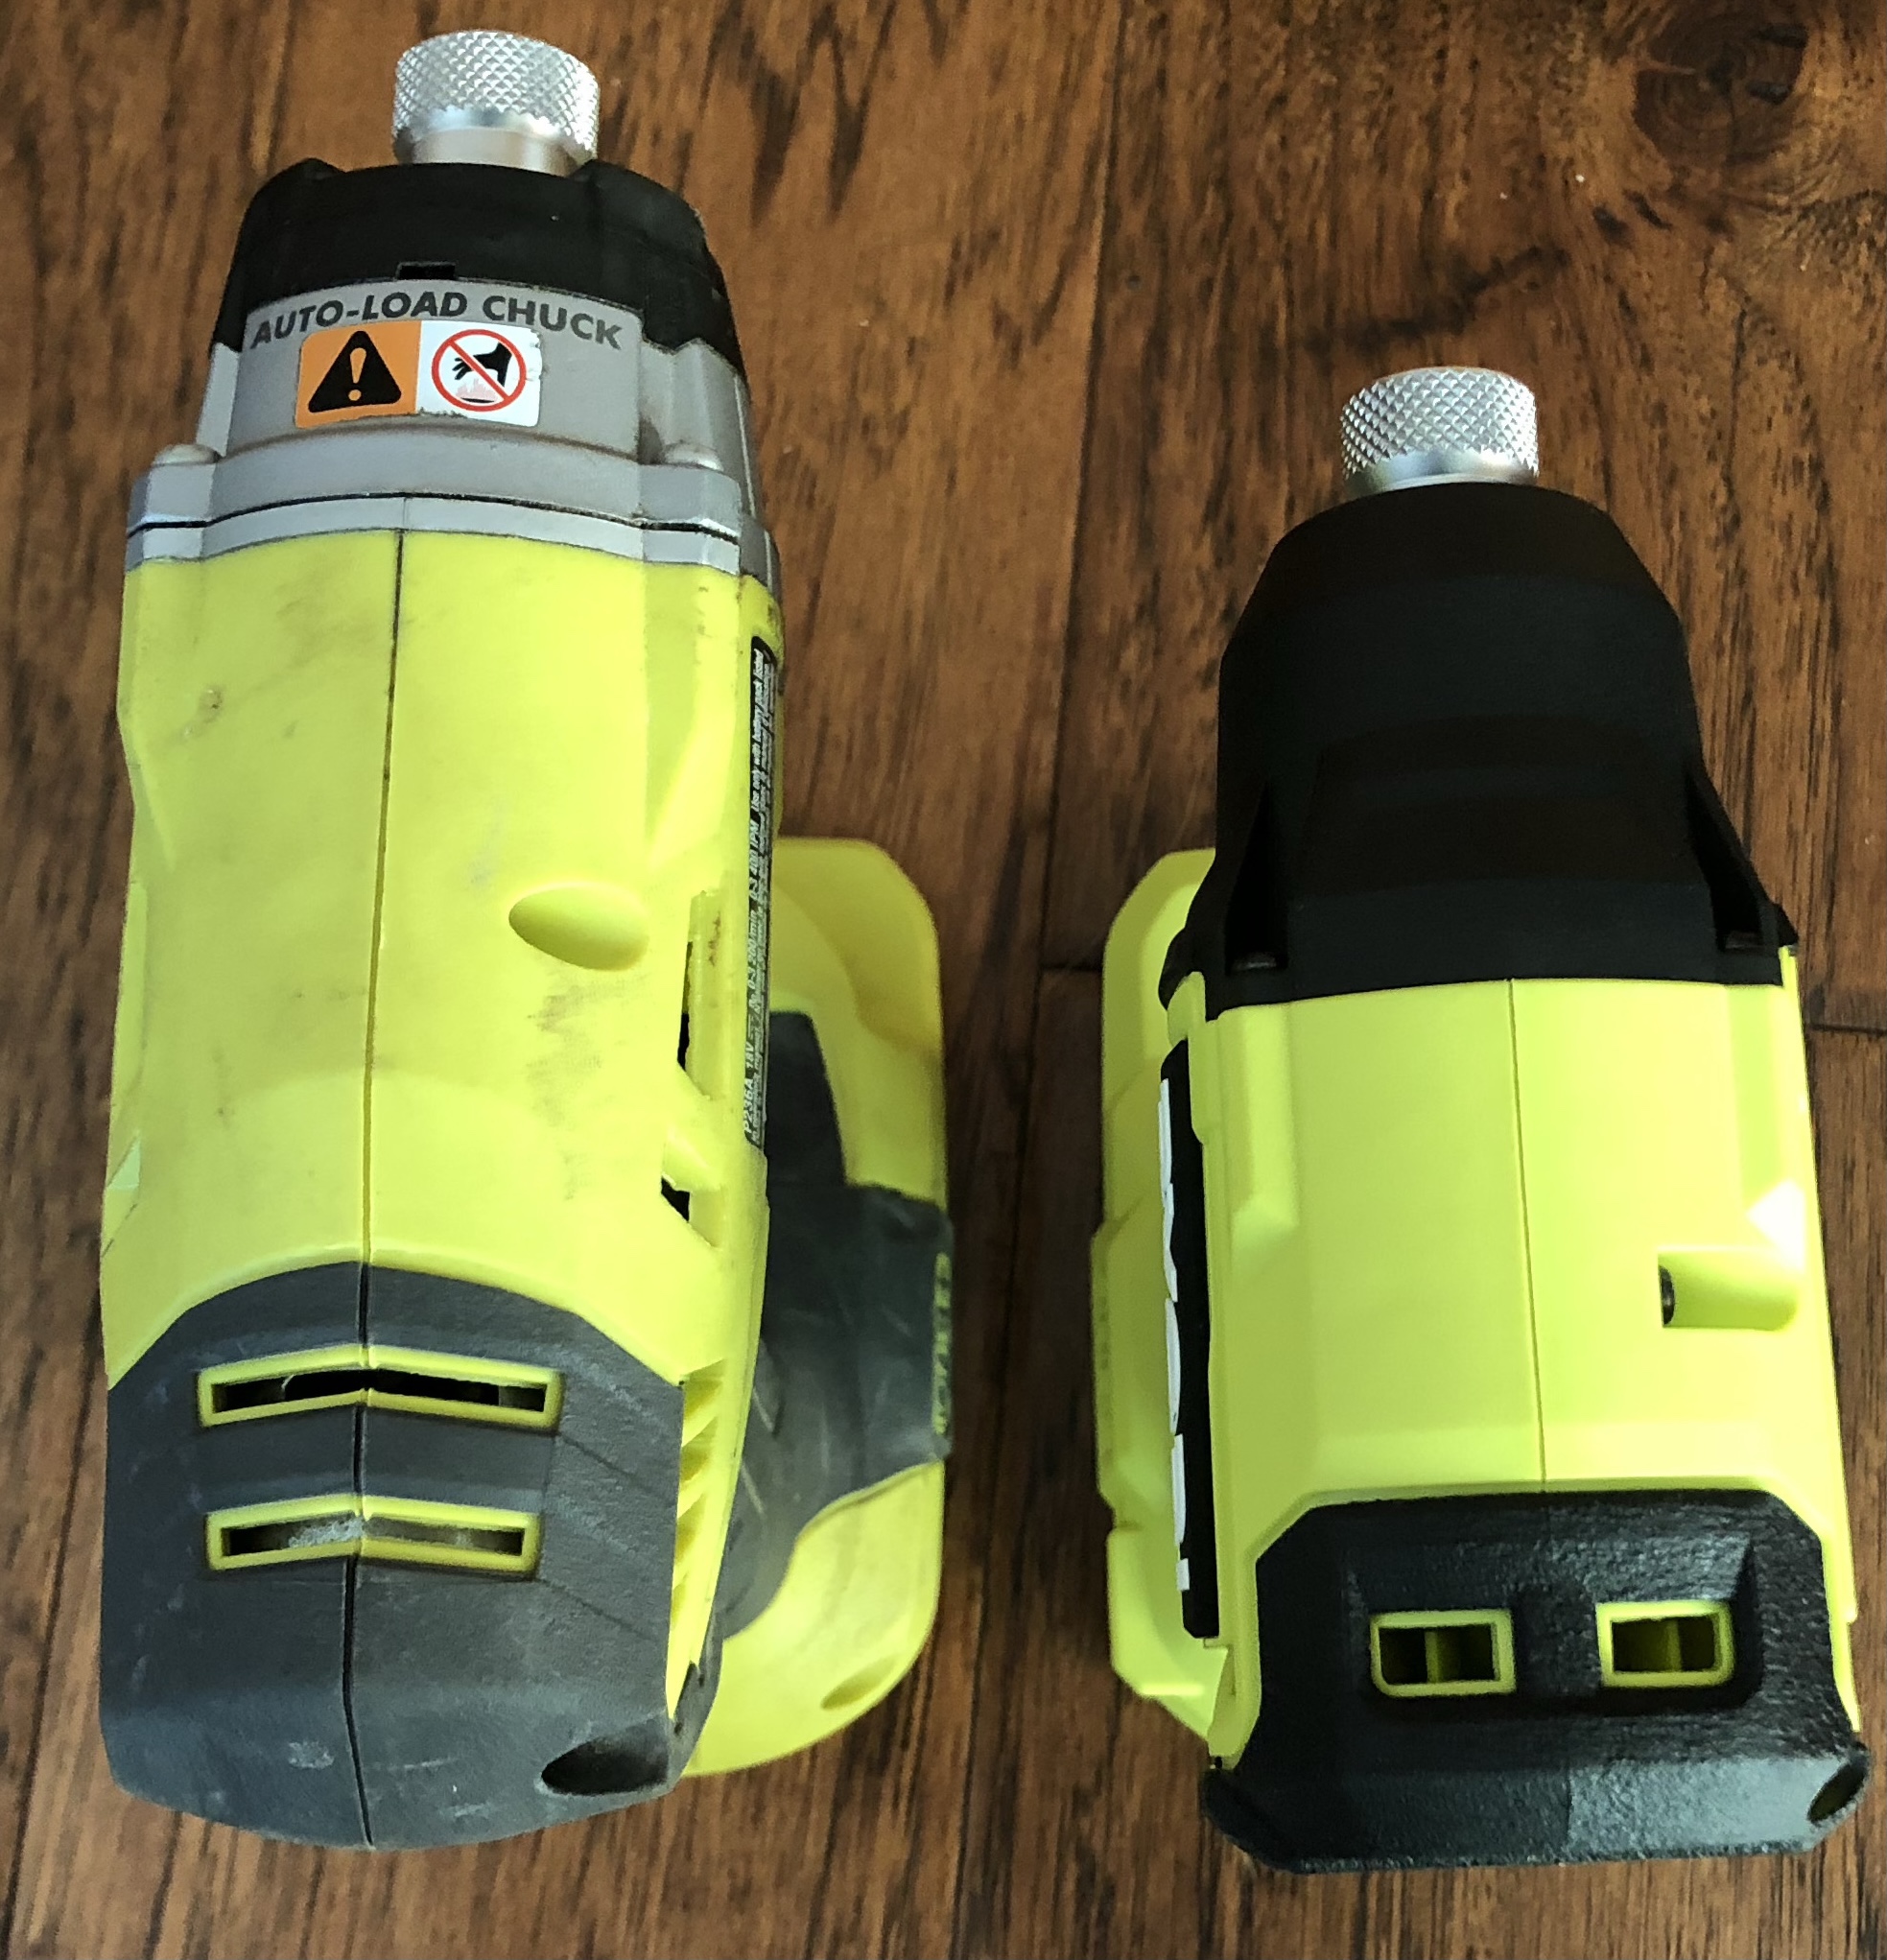
Left is old impact driver; right is new impact driver.I've used both tools briefly and they perform well. Are they better than the older tools? Maybe marginally, but it is hard for me to tell. I've seen a video where the person compared the new brushless drill/driver with the old brushless driver and found it less powerful (he had some odd results depending on the type of battery he used). Am I going to notice? I will definitely notice the weight difference, but probably not the performance.
Pros
- Brushless motors
- Lighter than what I already had
Cons
- May not provide better performance (depending on what you already have)
Summary
If you have existing tools that work, it is really hard to justify these new HP brushless drill/driver. Having extra batteries is always good and the lighter ones are well worth it for me. If the tools last as long as my old ones, then this will be an excellent purchase.I was impressed enough with the set that I purchased the combo set for my dad. He has been using a 12V DeWalt drill for ages that is starting to fail. He likes the lightweight tools and I hope that he can get as excited for the Ryobi tools as I am.