-
First Impressions: 2017 Subaru Impreza
For the last year and half, I've been looking for a new car. My 2003 Toyota Highlander has been starting to show its age. It has low mileage, but I've had to do some maintenance on it. In addition, the only tech I have on it is a radio I installed about 2 years ago with Bluetooth. One of the features I've really wanted is Apple's CarPlay as it would allow me to have a familiar interface in the car for navigation, media, and phone. While the number of cars with CarPlay available has been increasing, most haven't been cars that I'd want to own.
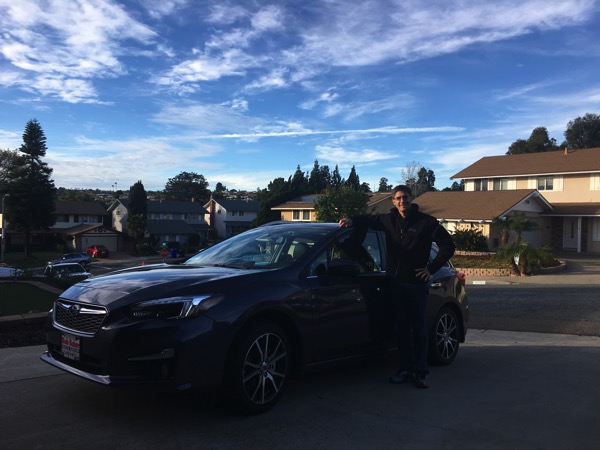
In July, I happened to look at Apple's CarPlay site and saw that the 2017 Subaru Impreza would have CarPlay. I looked online at the car and it looked like it could fit the bill. However, it wasn't going to be available until the end of the year, so I'd have to wait. In the last few weeks, I started looking at inventory at the local dealers and saw that cars were in transit. I picked the color and options and used a car buying service to negotiate the price for me. Last Thursday was the day for me to test drive it and see if it really was the car.
Going from an SUV to a small car was definitely going to be a change, but I don't really need an SUV (helpful a few times a year). Fuel economy was going to improve and a smaller car might be more fun to drive.
When I first got in the car, besides being much lower than my Highlander, I found that the side and rearview mirrors were larger than I expected. Last year I test drove an Audi A3 e-tron and the mirrors on that thing were tiny. I was worried that the smaller car wasn't going to be able to accelerate on the freeway, but was pleasantly surprised how well it did. The tech, at first, was a bit distracting. There are 3 displays! One is behind the steering wheel, one is the center display for radio, maps, phone, and the third is an info display that can be used for radio info, weather, MPG, etc.
After the test drive, I was ready to buy; I promised my wife that I wouldn't buy a car without her seeing it. We went back the next day and I left with a new car.
I've driven it for 3 days now on city streets and highways and have gotten a pretty good feel for the car. While I've tried to go through the manuals, there is far too much information in them for me to consume right now. I chose the Impreza 5 Door Limited with EyeSight. I'm a tech guy and not a car guy, so I picked the car based on the tech and specifications. The fact that it was pleasant to drive was almost a bonus!
My impressions are in no particular order.
Pros
- Backup camera has lines showing where the car will go.
- Blind spot detection; can be annoying at times as it lights up almost constantly on the freeway as people are passing.
- Rear cross traffic alert. Getting out of a parking space at SeaWorld is a nightmare. This and the backup camera (and of course looking with my eyes), got me out of a space safely.
- Impressive turning radius. Specs say less than 18'; my Highlander appears to have been about 38'!
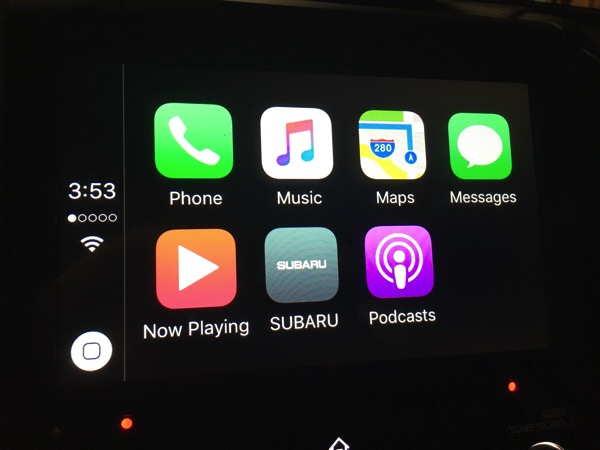
- CarPlay. Enough can't be said about this. When I've gotten in the car, it knows where I'm going (based on my calendar) and offers to navigate. Phone integration is great and so is music. Controlling everything with Siri works well (better than Siri on my Bluetooth radio in my old car). One thing to be cautious about is if you use maps all the time, you're going to use up some of your cellular data. After a few hours of driving, I used almost 12 MB of data for Maps alone. I'm going to keep an eye on this; even at 10 MB of data per day on maps, that won't be a problem on my current plan. (I pay for 2 GB, buy AT&T has given me 2 GB bonus per month plus I have rollover. At a minimum I have 4 GB per month and the most I've used is 3 GB.) If someone streams music and uses Maps all the time, this could be costly.
- Speed adjusted volume. There is a setting to make the sound louder when the car is going faster. This is great for freeway driving. I'm still playing with the setting as I think the max setting is a little high as the volume increases even at lower speeds.
- While not documented, it appears that there is a separate volume level for the radio, for navigation (using CarPlay), and for phone. If you adjust the volume while the navigation is speaking, there is a different icon on the display. This is great as I don't need it really loud.
- The keyless entry allows me to leave the key in my pocket. This is really neat and convenient. In addition, since the key uses proximity for unlocking, you have to be pretty close to the car to unlock it. While I can still push the button on the remote, I think the proximity is more convenient and potentially safer due to a potential replay attack.
- Handling is good; while I haven't gone zipping around that many curves, I like how it handles.
- Acceleration is much better than I expected. Coming from a larger engine, I was worried about being able to get up to speed in traffic. I haven't found that to be a problem.
- Quiet. I know this is subjective, but it seems like the ride is quieter.
- Lane departure warning; this feature is one that I hope to never use, but have already heard it beep when I was driving due to 2 lanes merging and I was slightly over the line. The system that actually keeps the car in the lane has to be turned on separately (it isn't automatic).
- While not specific to this car, Subaru put all the manuals in PDF on their website. Unfortunately they separated the manuals into 20 parts. It took me awhile to grab all the pieces and put it back together; I'd rather a 50 MB PDF than 20 smaller ones that are harder to search.
Cons
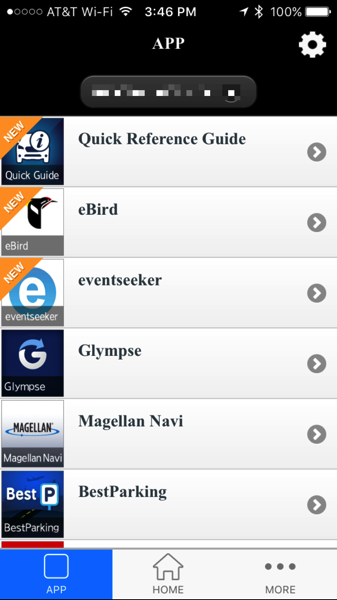
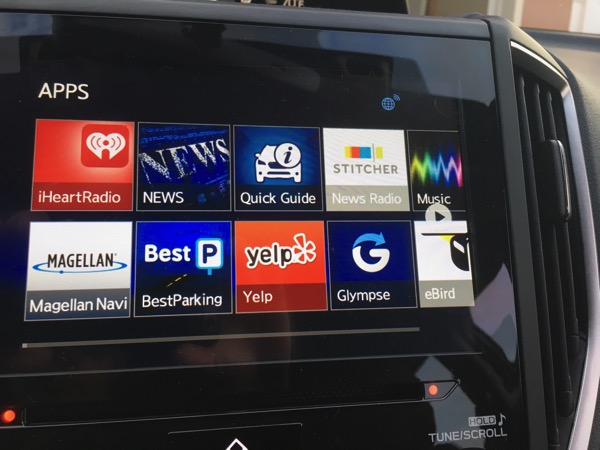
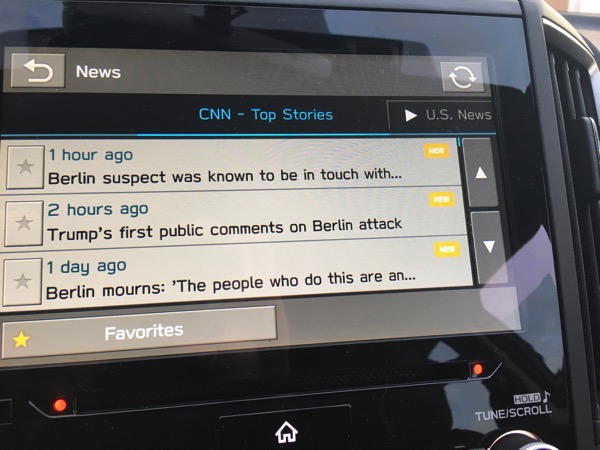
- The STARLINK multimedia apps (not the system that gets help in an emergency) is a bit outdated for a system that supports CarPlay. With CarPlay, there is no reason (that I can think of) to use Subaru's app. The whole system is truly a piece of crap. The iPhone app looks like iOS 3 or 4; the display in the car isn't much better. The apps take forever to load (we're talking 30 seconds) and the second time I tried the system, I couldn't get the apps to come up (tried for about 20 minutes). Frankly I wish there was an option to completely hide it. This is NOT a selling point for the car. If the navigation system is anywhere near as bad as this, I'd steer clear of it. It appears that this system was designed by Clarion. I'll be removing the app from my phone (it is required for the head unit piece to work). Even though CarPlay is limited (I'd like to see Navigon on it), the interface is well thought out and looks good.
- No lumbar support in seat.
- Too many settings in too many places. Each of the 3 displays has a way to change settings.
- It's low to the ground. I'm not used to this and right now I'll call it a con.
- There are all kinds of warnings about cleaning the inside of the windshield to protect the cameras for the EyeSight system. The instructions say to use a piece of copy printer taped over the cameras when cleaning. Subaru should have provided a rubber boot that fits the system; this would have been less error prone and would have protected the camera better.
- No good place to put my phone in the car. In order to use CarPlay, I have to plug in my phone to USB; the USB plugs are in the center console and allow me to route the cord outside of the console. For now, I leave my phone upside down in the cup holder. I'd love a dock (with Lightning connector) like I have on my desk (it would have to be a bit more secure, though).
- Less cargo space. This is pretty obvious as I came from a larger vehicle. I think the only time I'll have a problem is when we go camping. I'll have to get a roof box for those few times a year.
- No ability to remove some options from the multimedia menu. I just want CarPlay, radio, and settings to show up.
- The button to lock all the doors is hard to find by touch. This could have been mitigated by an option to lock all the doors when the car is put in drive, but that doesn't appear to exist.
- Too much information can be distracting. I'm trying to find the settings I like that keep distractions down.
- One of the information displays is right behind the steering wheel causing the analog speedometer to be moved to the right; this is partially obscured and I have found that I have to use the digital speedometer in the display in order to easily see my speed.
- Not specific to the car, the mysubaru.com app and site don't let you do an initial login on a phone as the page is too long to fit an iPhone 6s screen and it doesn't screen. Also the app appears to just be the mobile website.
Things that would have been nice
- Dual front climate control (manual talks about this, but didn't appear to be an option).
Summary
I'm truly amazed at how many things this car got right. It has all the safety features I want, all the tech I want, and the price didn't break the bank. In fact, I read an article that indicates the average selling price for a car is over $34,000! I'm not sure how people afford these cars or what they get for more money, but my Subaru came in at under this. I'm enjoying driving the car and I hope the fun continues.
Feel free to ask questions!
-
Review: ShimoVPN
Ever since I started working, I've had to connect back to an office network either occasionally or full time. First there was AppleTalk Remote Access and then there were a variety of VPN solutions that different companies employed. While macOS has gotten better at supporting VPNs natively, it really only handles Cisco and IPSec VPNs. This has worked for some of my connections, but for others, I've had to have a separate VPN client. Those VPN clients have ranged from bad to worse in terms of quality. Why they are so bad, I have no idea.
Several years ago, I tried out ShimoVPN to connect to my companies network as the native Mac client didn't have a feature I wanted (I can't remember what). Shimo worked, but the native client was good enough and I forgot about Shimo.
Now that I'm self-employed again with several clients, I decided to take another look at Shimo. In particular, I didn't want to run all my traffic over a client's VPN and I also wanted to be able to connect back to my own OpenVPN server (the native Mac client doesn't handle OpenVPN and the free OpenVPN client didn't work). After I installed ShimoVPN, it imported my configurations and I was quickly able to get things setup. At that point, it didn't buy me anything for my clients over the native Mac client.
The power of ShimoVPN comes into play in how it can setup specific routing. I only want certain traffic to go over the VPN and Shimo lets me configure that on a per VPN basis.
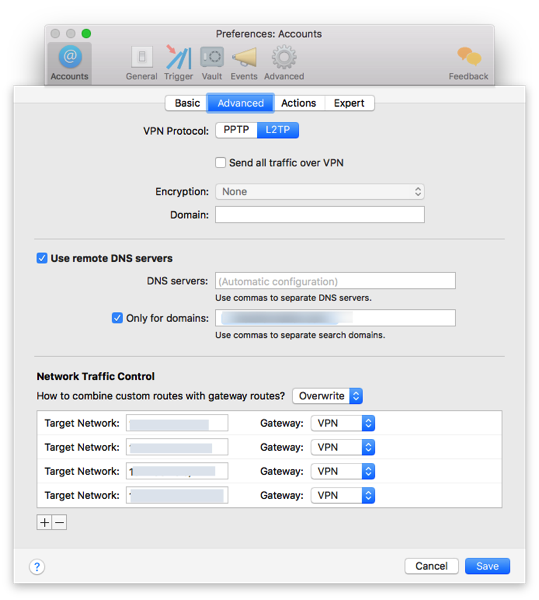
I set this up for 2 of my clients and am able to have both VPNs up at the same time and connect to sites on both without having to disconnect and connect to a particular VPN. This feature alone is worth the money for Shimo!
Shimo has one additional feature that make it a must use application for me. The first is that it automatically reconnects to the VPN when my machine wakes up. This, of course, works best when 2FA isn't used as I'm not prompted. Another feature it has is the ability to setup triggers to connect and disconnects from certain VPNs based on WiFi SSID, location, and other conditions. I haven't used this feature much, but the potential to simplify things is great.
Pros
- Handles OpenVPN connections.
- Allows custom routing.
- Has triggers for certain events.
- Reconnects automatically upon disconnect.
Cons
- Cost (built in macOS client is free).
- Powerful features require some networking knowledge to setup.
Summary
ShimoVPN is a utility that most people won't need, but for those that do, it will pay for itself pretty quickly. VPNs are necessary and while ShimoVPN won't me on anyone's holiday wishlist, it is definitely going to remain a tool in my toolbelt.
-
Dependency Management
With most software projects these days, including open source components is almost a given. There is no reason to reinvent the wheel and some components are so customized that it would take months to mimic the behavior. There are many ways to integrate these components into an application. One of my mantras when working on projects is that I just want to be able to checkout the project from a repository and build it; there shouldn't be several steps and I shouldn't have to worry about something outside of my control breaking the build.
Years ago when I worked on a particular project, there was a several step process to just get the source code which integrated open source components. This was extremely fragile as the references to the open source components was for an external repository that could go away at any time. When I became in charge of the project, I changed things so that we only relied on repositories that were under the control of the company (we had shared components).
In iOS development, there are now 2 (or 3) main systems for managing these external dependencies. The first is CocoaPods which is very popular, but relies on the external repositories to always be there and requires modifications to how the project is built. The newer entrant into this arena is called Carthage. Carthage gives me more control on the dependencies. The system makes it easy to store the dependencies in my repo and easily update them. In particular, I use the following command to update
carthage update --platform iOS --no-buildBasically I just let Carthage update the components and I have my project setup to do all the builds. When I checkout the project, it has everything in it and I just build. I think that this setup, at least currently, strikes the best balance to handling dependencies.
The other day I was reminded of this problem when a developer was describing dependencies on one of my projects; the developer basically said that he used a dependency management system that didn't store the components with the source code. I've been writing software for awhile now and while open source makes it easier to get things done, many developers don't consider the entire build process or risks involved in not having control over all the components.
-
Mobile App Done Right
Last week I went to test drive a new car and after test driving, I was ready to buy. There are, of course, a number of steps required to purchase a car including securing a loan, providing proof of insurance, and getting insurance for the new vehicle. I've used my banking and insurance company's app for years basically to check my account balances. For the last year or so, I've checked my credit card balance almost weekly to make sure it isn't too high in anticipation of applying for a car loan. The app was useful for this, but that didn't prove the power of the app.
When it came time to apply for a loan, I pushed a few buttons on the app (while someone else was driving), applied for a loan, got approved, and signed all the loan documents. On top of just getting the loan, the app let me fax or email the payment instructions directly to the dealer. In case that wasn't enough, I knew I needed insurance and didn't know what my insurance company provided on a new car before I spoke to them, so I looked on the app to see what I could do. Even before I left the finance guy's office, I had entered the VIN of the car into the app, got a quote on the new policy and added the car to my policy. The app also provided me with proof of insurance. Now that was cool.
Apps can do so much these days, it is so hard to know what I want an app to do until I have a need. It's not like I'm going to do this every day or week, but knowing that this company has put in just about every feature you could imagine to handle everyday and occasional needs makes me even more pleased that I've used them for a long time.